Showing posts with label painting. Show all posts

Sunday, August 8, 2010

From boring dining room to funky European dining area!

So when we moved in this house, the dining room was one of the colors we decided to just leave the way it was for a while. We knew that one day we'd want it orange, but didn't mess with it much...until now!

Here's the before..taken at Thanksgiving before we all sat to eat!
and here we all are eating.. Nov. 2009

Now for the after..a little background on the European theme. About a year & a half ago we moved from Germany! The hubs was in the Army and we lived there for 4.5 years on the economy near our Army post. EVERY building in Germany is a different color than the one before it! They are red, pink, blue, green, purple, EVERY color you can think of! It's soooo neat. We loved that part about it. So rich in color. We heard that the reason that was, was due to the fact that when Hitler reigned Germany, he MADE everyone paint their homes the same color, so dreary & drab. So when that ended, they all wanted their colors to show! I think it's pretty neat. :)

Anywho...without further adeu..
These are pics of us in Pisa, Venice, Rome, and Paris.
The sign says "The Will of God will never take you where the grace of God will not protect you"
LOVE it. :)
Here's the hutch, and the gorgeous painting by Darryl's grandmother.
See that orange skirt on the lady in the painting? It inspired this very color!

This wall has our little wall plaques from Grafenwoehr (where we lived),
Neuschwanstein(famous castle), and Italy.
There are pics on this wall from Berlin, Trier, our boat ride on the Rhine River,
the Linderhof Castle Austria, Switzerland, and the 3 guys looking over the Tyrrhenian Sea in Italy.

It also displays our gorgeous cuckoo clock! We love it :)


And that's that! :) We love this room! Reminds us of Germany, and is filled with awesome memories
from our adventures there!


Monday, July 12, 2010

Knife block transformation! Gotta love spray paint..

My love for spray paint grows with every project!
Here's the before of my boring knife block..

I primed it with white primer and then used the red..
I went through photoshop, found a font I liked, typed "P" for our last name, and made it the
size I needed for the block..
Painted the edges of it, and smoothed it out..
Then I roughed up the entire block with some sandpaper, and here we have it!
Looks completely different and gives a pop of color in my kitchen! I love it!

Saturday, July 10, 2010

Crafting: Menu planning organization!

So every 2 weeks, I make a list of the dinners we'll be having, then I write the menu out for the days we'll have it, and write my grocery list accordingly.

Well, sometimes I lose the list, or get tired of looking for the notebook the menu is in, so I decided
that I needed a menu board! And not just any menu board, one I made myself! :)

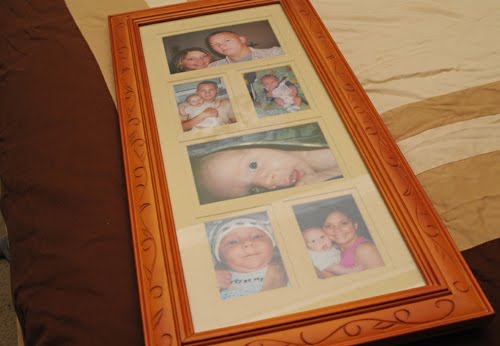
I've had this frame for years! You can tell because of the pics in it. My now 5 year old
was just an itty bitty baby in these pics :) And yes, I saved them all, don't worry!
I primed the frame.
then took the cardboard piece and covered it in some scrapbook paper that I loved. :)

Then I went ahead and painted it the beautiful sea breeze by Krylon that I had in my spraypaint stash..
and beat up the frame a little with some sandpaper ;)
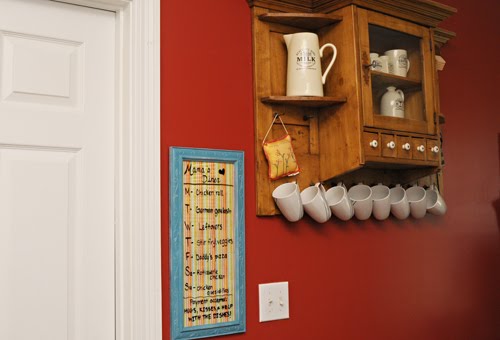
Added my own personal touches, and voila! Menu board awesomeness!
Every chef needs some payment every now & then, right?
I just LOVE it! I Love looking at it as I go by the kitchen, & I just love organization!
One of the best parts about this, was how cheap it was.
I bought one can of primer ($4@Lowe's) and one extra piece of scrapbook paper to match
the one I already had. (.50@HobbyLobby)
$4.50 for this project! Ahhh how I love making frugal look good! :)

Linking my craftiness here:

And to all of these:

Tuesday, May 4, 2010

DIY wall art for the bathroom!

This past weekend my hubs got to painting our ugly yellow-goldish bathroom
a beautfiul tan color--hot chocolate to be exact! ;)
Love it.
I needed some cute wall art, but didn't want to spend alot of $$ at the moment.
I had gotten a 3 pack of cute stencils at Hobby lobby during the week,
and these were perfect!

I had this canvas lying around for about a year & a half.. I had bought it on clearance when we lived in Germany. I spraypainted the canvas brown.
Then I used the same tan color that Darryl used for the bathroom, for the stenciled part!
I also added some blue in the center to make it pop a bit.
And there we go! Some cute, cheap, DIY wall art for the bathroom, that only
cost me a can of spraypaint, and $2.99 for stencils!
And since I had the paint out...
and had another smaller canvas on hand.
I decided to try out a few of the other stencils that came with the pack!
My two year old had different plans for me though.
Scribble painting is his game..

He was not happy that I got frustrated with him over the paint mess. LOL

If at first your two year old cutie messes it up...
try, try again.
Perfect for the stall part of the bathroom!
I love frugal ways to make the house look cuter and more decorated!
This was fun & super easy! And CHEAP! Since I had everything on hand except for the stencils and spray paint, I only paid about $5 for the supplies! Yay for cheap. :)

Linking to all of these parties!

Sunday, April 25, 2010

2 dollar box o' goodies= kiddos bathroom completion!

So a couple of weekends ago while garage sale-ing with my mom,
I scored this whole box of nautical stuff for $2!
As you can see the anchor is broken..but other
than that everything is in good shape!

This was just PERFECT for the finishing touches in
my boys/guest bathroom renovation!
First I sanded down the paddle.


Then wrote a cute little saying on it. The writing was difficult being that I only had
one of those paintbrushes that is used for kids watercolors! LOL

Rustic is what I was going for, and I think it worked!
Anyway, now onto this ungodly yellow color..


I painted it two coats of white, this is just after one though.
All I did with the red is sand it down a bit..
Then I added jute to both of them on each end, just for a different look!

I love me some jute!

Now to the anchor. I used some gorilla glue to put it back together..
And then covered the spot with jute so you'd never know it was broken!


And voila! Don't they look brand new?
And here's it all set up in the bathroom!
Love this!
And to think, this whole bathroom "upgrade" only cost $2!
See that sign above the towel rack?
It was GIVEN to me by an awesome friend of mine, who had
it and thought of me when I told her I was doing the boys'
bathroom in nautical theme!

Too sweet!
My how I LOVE garage sales!
"One man's trash is another man's treasure."
SO true!
CLICK HERE FOR FREE BLOG LAYOUTS, LINK BUTTONS AND MORE! »